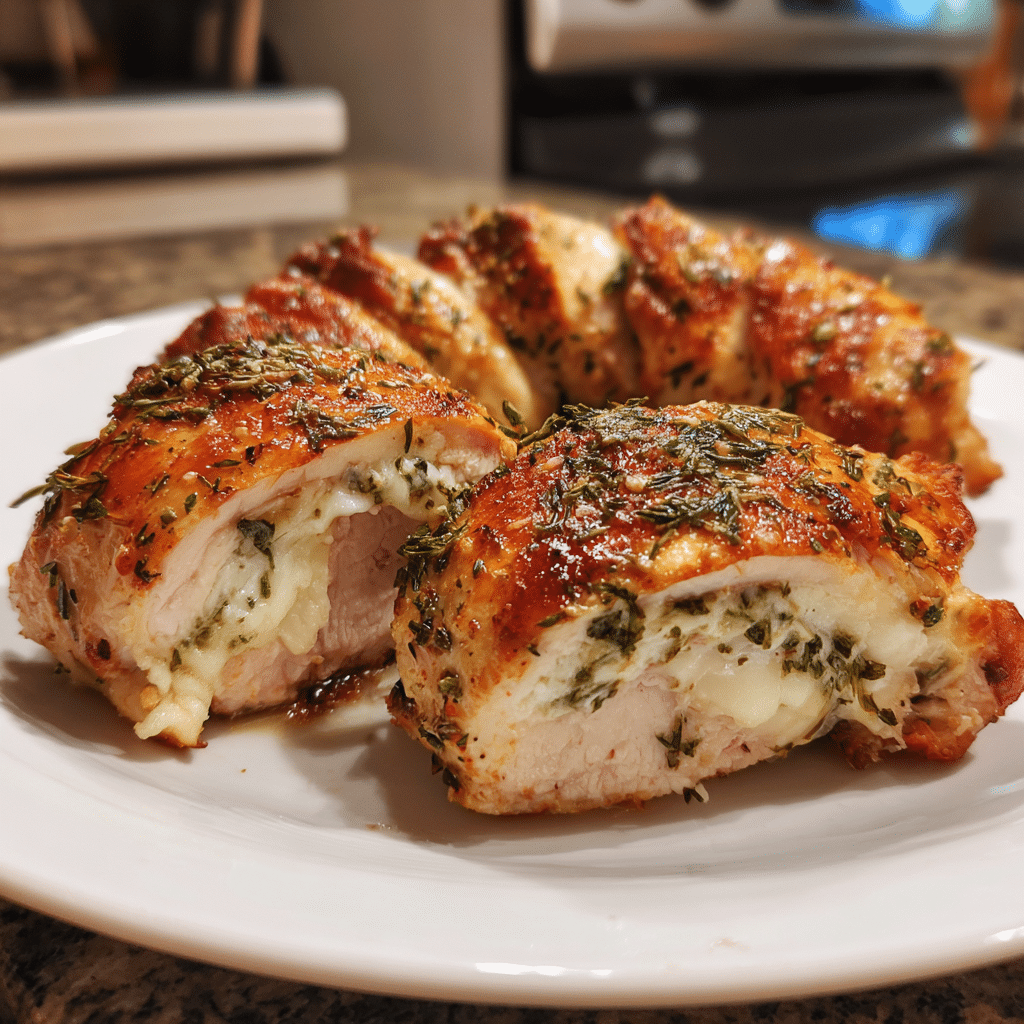
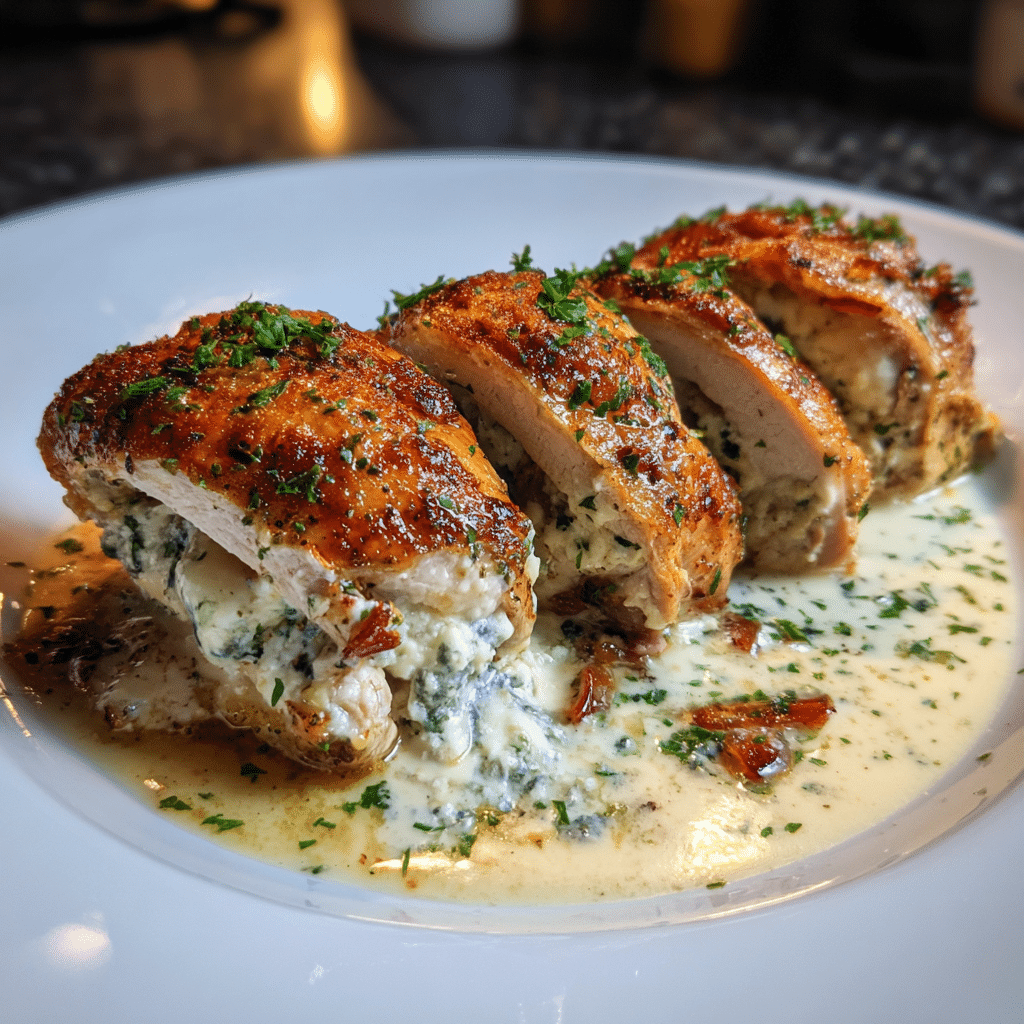
If you’re looking for a dish that feels elegant yet requires surprisingly little effort, these Flavorful Herbed Ricotta Stuffed Chicken Rolls are an excellent choice. Tender chicken cutlets are rolled around a creamy ricotta-herb filling, then baked until juicy, golden, and aromatic. It’s the kind of recipe that looks restaurant-worthy but is simple enough for weeknights. I first tried this on a night when I craved something comforting but not too heavy, and the balance of creamy ricotta and fresh herbs made it truly special. The filling stays soft and rich while the chicken remains moist—an impressive combination that works beautifully for dinners, date nights, or entertaining.
Why You’ll Love This Recipe
These Herbed Ricotta Stuffed Chicken Rolls offer a delightful blend of textures and flavors: creamy ricotta tucked inside tender chicken with bright herb notes throughout. They’re versatile, easy to assemble, and bake beautifully without fuss. You’ll appreciate how customizable the filling is—swap herbs, add spinach, or fold in grated cheese to make the dish your own. The finished rolls slice beautifully, making them both gorgeous on the plate and satisfying to eat.
Print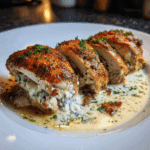
Flavorful Herbed Ricotta Stuffed Chicken Rolls – Elegant, Tender & Packed with Creamy Herb Filling
- Total Time: 45 mins
- Yield: 4 servings
- Diet: Halal
Description
Tender chicken breasts rolled and stuffed with a creamy ricotta herb filling, then baked until juicy and golden for an elegant, flavor-packed main dish.
Ingredients
- 4 boneless, skinless chicken breasts (pounded thin)
- 1 cup ricotta cheese
- 1/2 cup grated Parmesan cheese
- 1 cup fresh spinach, chopped
- 2 cloves garlic, minced
- 1 tbsp fresh parsley, chopped
- 1 tsp Italian seasoning
- 1/2 tsp salt
- 1/2 tsp black pepper
- 1 tbsp olive oil
- 1 cup marinara sauce (optional)
Instructions
- Preheat oven to 375°F (190°C). Lightly grease a baking dish.
- In a bowl, combine ricotta, Parmesan, spinach, garlic, parsley, Italian seasoning, salt, and pepper. Mix well.
- Lay the pounded chicken breasts flat and spread a generous spoonful of the ricotta mixture onto each one.
- Roll each chicken breast tightly and secure with toothpicks if needed.
- Heat olive oil in a skillet over medium heat and sear the chicken rolls on all sides until lightly browned.
- Transfer the seared chicken to the baking dish. Spoon marinara sauce over the top if using.
- Bake for 25–30 minutes, or until the chicken is fully cooked through.
- Let rest for 5 minutes before slicing and serving.
Notes
- Use basil or thyme for additional herb flavor.
- Swap spinach for kale or sun-dried tomatoes.
- Sear the rolls well for extra color and flavor.
- Prep Time: 15 mins
- Cook Time: 30 mins
- Category: Main Dish
- Method: Baking
- Cuisine: Italian
Ingredients
(Tip: You can find the complete list of ingredients and their measurements in the recipe card below.)
Chicken breasts – Thinly sliced or pounded into cutlets for easy rolling and even cooking.
Ricotta cheese – Forms the creamy, luscious filling inside each chicken roll.
Parmesan cheese – Adds savory depth and helps enrich the ricotta mixture.
Fresh herbs (parsley, basil, or thyme) – Bring brightness, fragrance, and freshness to the filling.
Garlic – Enhances the savory flavor of the ricotta mixture.
Lemon zest – Adds subtle citrus notes that lighten the rich filling.
Salt and black pepper – Essential seasonings for both the chicken and filling.
Olive oil – Helps brown the chicken and adds richness.
Italian seasoning – Provides warmth and depth to the outer chicken layer.
Bread crumbs (optional) – For a lightly crisp exterior if desired.
Egg (optional) – Helps breadcrumbs adhere when using a coated version.
Directions
Preheat your oven to 375°F (190°C). Lightly grease a baking dish with olive oil.
In a mixing bowl, combine ricotta cheese, grated Parmesan, chopped fresh herbs, garlic, lemon zest, salt, and pepper. Mix until smooth and evenly combined. Taste and adjust seasoning as needed.
Place chicken cutlets on a flat surface and season both sides with salt, pepper, and a sprinkle of Italian seasoning. Spread a spoonful of the ricotta mixture onto each cutlet, leaving a small border around the edges. Roll each piece tightly and secure with toothpicks if needed.
If you prefer a lightly crisp exterior, dip each roll in beaten egg and coat in breadcrumbs. Otherwise, drizzle the rolls lightly with olive oil.
Arrange the chicken rolls in the prepared baking dish. Drizzle with a bit more olive oil or spoon a small amount of the remaining ricotta mixture alongside the rolls (not on top).
Bake for 25–30 minutes or until the chicken is cooked through and golden. If you want extra color, broil the rolls for the last 2 minutes. Let rest briefly before slicing into medallions.
Serve warm with a garnish of extra herbs or a squeeze of lemon juice.
Equipment needed :
Must-Have Tools to Get Rolling
Here’s what you’ll want to have on hand:
Silicone Spatula – Durable, heat-resistant silicone spatula perfect for mixing, scraping, and spreading. Gentle on non-stick cookware and easy to clean.
Large pot – You’ll need this to boil the whole cabbage head and soften the leaves.
large bowl –Spacious, durable large bowl ideal for mixing, serving, or food preparation. Made from sturdy material and easy to clean.
Sharp knife – For coring the cabbage and slicing out the thick stem in each leaf. A paring knife works best.
Mixing bowl – A big bowl makes it easier to combine your meat and rice filling evenly.
Cutting board – For prepping cabbage leaves and rolling them like a pro.
9×13-inch baking dish – Ideal size to fit your rolled cabbage leaves snugly and prevent them from unraveling.
knife – A sharp, durable kitchen knife perfect for slicing, chopping, and dicing with ease.
Servings and timing
This recipe serves 4 people. Prep takes about 15 minutes, and baking takes 30 minutes for a total time of 45 minutes.
Storage/reheating
Store leftovers in an airtight container in the refrigerator for up to 3 days. Reheat gently in a 325°F (165°C) oven for 10–12 minutes or microwave in short intervals. Avoid freezing, as ricotta can become grainy once thawed.
Variations and Customizations
Spinach Ricotta Rolls – Add sautéed spinach to the filling for extra nutrition and color.
Sun-Dried Tomato & Herb Filling – Fold chopped sun-dried tomatoes into the ricotta for a Mediterranean twist.
Garlic Parmesan Crusted Rolls – Coat the outside with seasoned breadcrumbs and extra parmesan.
Pesto Ricotta Rolls – Stir a spoonful of basil pesto into the ricotta mixture.
Mushroom Herb Filling – Add finely chopped sautéed mushrooms for umami depth.
Lemon Herb Chicken Rolls – Increase lemon zest and add a squeeze of juice after baking.
Cream Cheese Blend – Mix cream cheese with ricotta for an extra-rich filling.
Bacon-Wrapped Chicken Rolls – Wrap each roll in thin bacon slices before baking.
Marinara-Baked Version – Spoon marinara sauce over the rolls before baking for an Italian-style dish.
Low-Carb Option – Skip breadcrumbs and serve with roasted vegetables.
FAQs
Can I use chicken thighs instead of breasts?
Yes—flatten them well for even rolling.
Does the ricotta need to be drained?
If it’s very wet, draining helps the filling stay firm.
Can I make these ahead of time?
Yes—assemble and refrigerate up to 24 hours before baking.
Can I air fry this recipe?
Yes—air fry at 375°F for 15–18 minutes, checking for doneness.
Can I use dried herbs?
Fresh herbs work best, but dried herbs can be used in smaller amounts.
Should I sear the rolls first?
It’s optional, but searing adds color. Baking alone works well.
Can I add vegetables inside the rolls?
Yes—spinach, roasted peppers, or thin zucchini strips work beautifully.
How do I keep the rolls from unrolling?
Use toothpicks or kitchen twine to secure them before baking.
Can I use flavored ricotta?
Yes—herbed ricotta makes prep even easier.
What side dishes pair well?
Roasted vegetables, pasta, rice, or a fresh salad all complement them nicely.
Conclusion
These Flavorful Herbed Ricotta Stuffed Chicken Rolls are tender, creamy, and bursting with herb-forward flavors. They offer a beautiful balance of richness and freshness, making them perfect for weeknight dinners and special meals alike. With simple ingredients and impressive results, this recipe is sure to become a cherished addition to your collection.
Hungry for more? Visit our website for full recipes and follow us on Pinterest for daily foodie inspo you’ll love to pin!