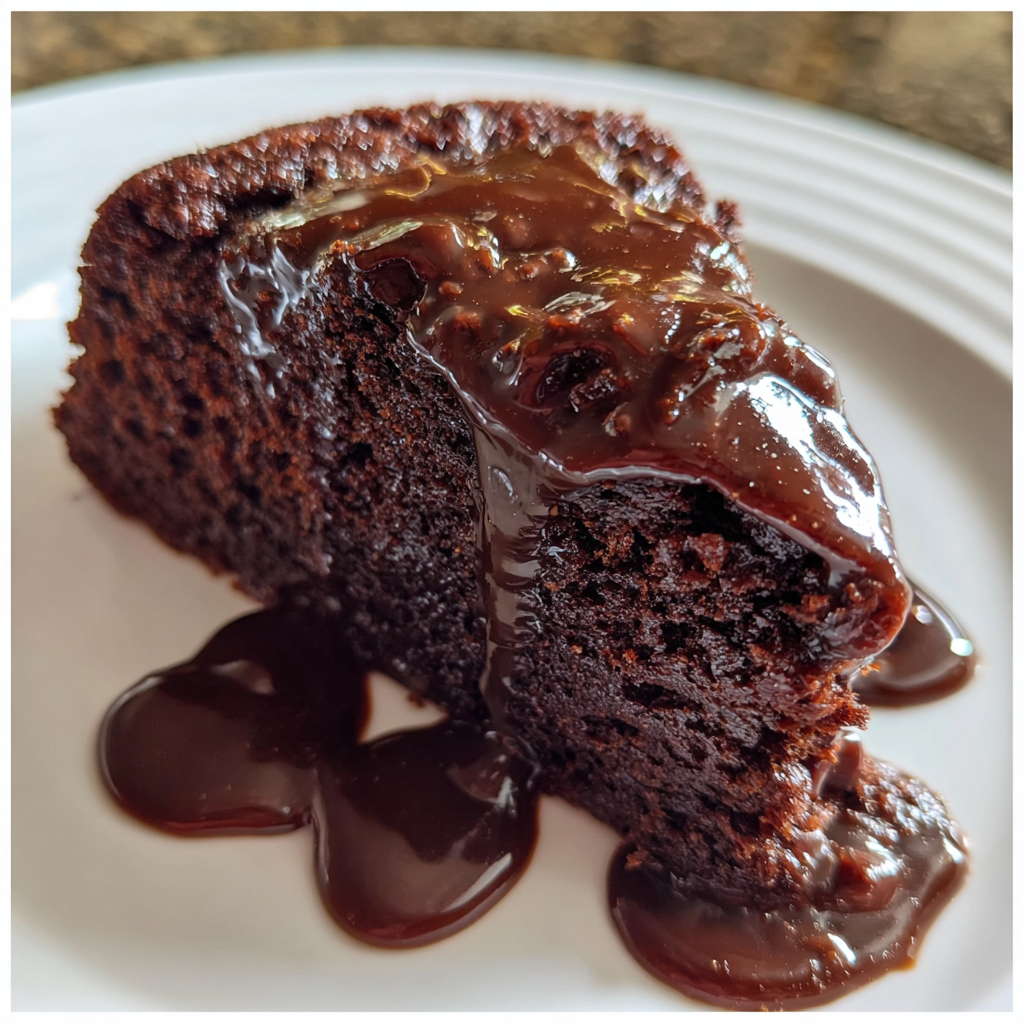
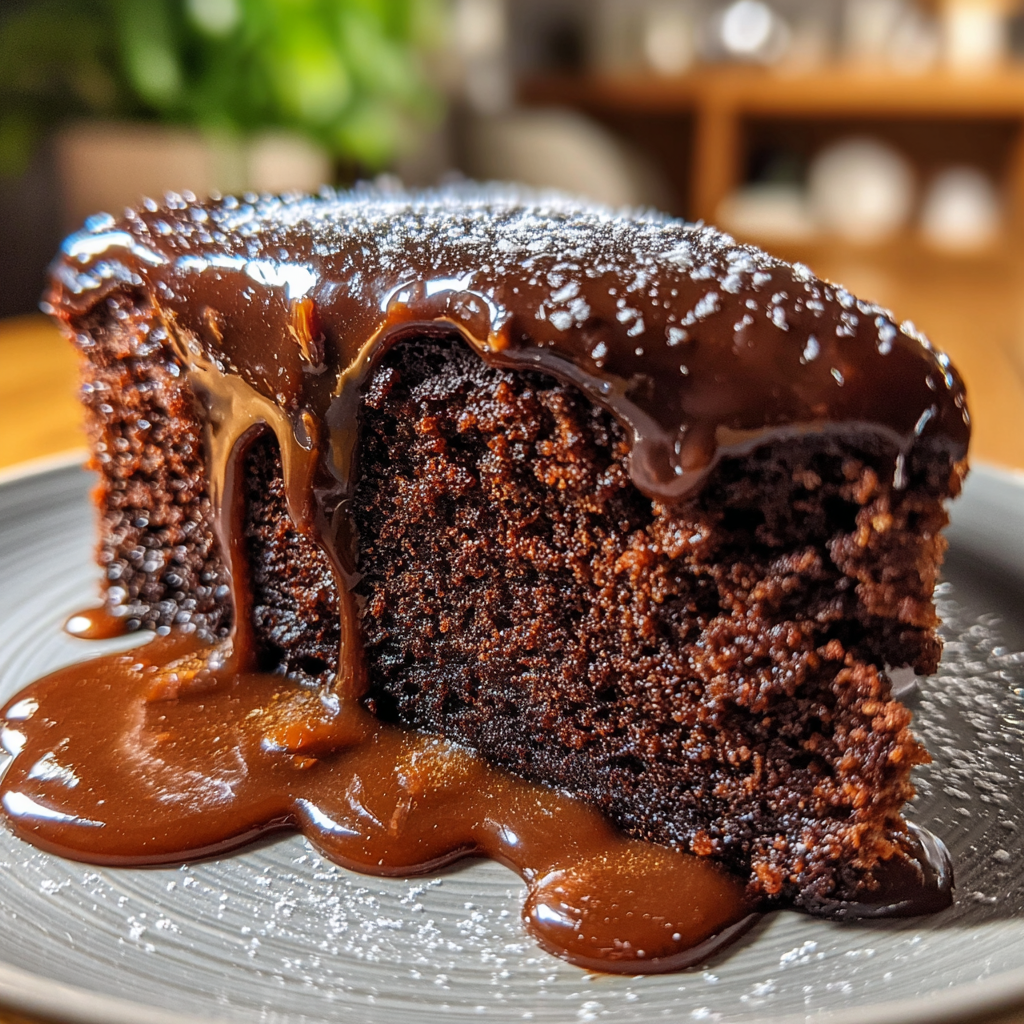
There are days when you crave chocolate cake but do not want to turn on the oven or bake a large batch. That is exactly how this 1 Egg Chocolate Cake (No Oven) became one of my favorite quick desserts. It is soft, rich, and deeply chocolatey, yet made with simple pantry ingredients and cooked on the stovetop. The best part is that you only need one egg, making it perfect when you are low on ingredients.
The first time I tested this recipe, I was surprised at how fluffy the texture turned out despite being cooked without an oven. I even tried it once using almond milk instead of regular milk, and it worked beautifully, keeping the cake moist and tender. Whether you are baking in a small kitchen, avoiding the oven in hot weather, or simply need a quick chocolate fix, this recipe delivers consistent, satisfying results.
Why You’ll Love This Recipe
This cake is ideal for small households or quick cravings. It uses just one egg, making it economical and practical. The stovetop method ensures you can prepare it without an oven, which is especially useful during warm months.
The texture is soft and moist with a delicate crumb. Despite its simplicity, the chocolate flavor is rich and satisfying. It is also highly adaptable; you can frost it, dust it with cocoa powder, or serve it plain with tea or coffee.
Another advantage is the quick preparation time. With minimal equipment and straightforward steps, even beginner bakers can achieve excellent results. The ingredients are common pantry staples, so there is no need for specialty items.
Print
1 Egg Chocolate Cake (No Oven): Rich, Moist & Effortlessly Simple
- Total Time: 45 minutes
- Yield: 6 slices
- Diet: Vegetarian
Description
A soft and moist 1 egg chocolate cake made without an oven. This easy stovetop cake is rich, fluffy, and perfect for small-batch chocolate cravings.
Ingredients
- 1 cup all-purpose flour
- 1/4 cup unsweetened cocoa powder
- 1/2 tsp baking soda
- 1/2 tsp baking powder
- 1/4 tsp salt
- 1/2 cup granulated sugar
- 1 large egg
- 1/2 cup milk
- 1/4 cup vegetable oil
- 1/2 tsp vanilla extract
- 1/2 tsp vinegar or lemon juice
- 2 tbsp chocolate chips (optional)
Instructions
- Grease a 6-inch round cake pan and line the bottom with parchment paper.
- In a bowl, sift together flour, cocoa powder, baking soda, baking powder, salt, and sugar.
- In another bowl, whisk egg, milk, oil, vanilla extract, and vinegar until well combined.
- Gradually mix the wet ingredients into the dry ingredients until smooth. Do not overmix.
- Fold in chocolate chips if using.
- Pour the batter into the prepared cake pan and tap gently to remove air bubbles.
- Preheat a heavy-bottomed pan or large pot on low heat for 5 minutes. Place a metal stand or ring inside.
- Place the cake pan on the stand, cover with a tight lid, and cook on low heat for 30-35 minutes.
- Check doneness with a toothpick; it should come out clean.
- Remove from heat, cool completely, then unmold and serve.
Notes
- Always cook on very low heat to prevent burning the bottom.
- Do not open the lid frequently while cooking.
- You can top with chocolate ganache or powdered sugar.
- This recipe can also be steamed instead of stovetop baked.
- Prep Time: 10 minutes
- Cook Time: 35 minutes
- Category: Dessert
- Method: Stovetop
- Cuisine: International
Ingredients
(Tip: You can find the complete list of ingredients and their measurements in the recipe card below.)
All-purpose flour
Provides the structure of the cake and ensures a soft crumb.
Cocoa powder
Delivers deep chocolate flavor. Use unsweetened cocoa powder for best results.
Granulated sugar
Adds sweetness and balances the bitterness of the cocoa.
Egg
Just one egg is enough to bind the ingredients and give structure.
Milk
Keeps the cake moist and smooth. Almond milk can also be used successfully.
Vegetable oil
Adds moisture and ensures a tender texture.
Baking powder
Helps the cake rise during stovetop cooking.
Baking soda
Works with the cocoa to provide additional lift.
Vanilla extract
Enhances the chocolate flavor.
Salt
Balances sweetness and intensifies overall flavor.
Hot water or coffee
Helps bloom the cocoa powder, creating a richer chocolate taste.
Directions
Begin by greasing a small 6- or 7-inch round cake pan that fits comfortably inside a large, heavy-bottomed pot. Place a metal stand or ring at the bottom of the pot and cover with a tight-fitting lid. Preheat the pot on low heat for about 5–10 minutes.
In a mixing bowl, whisk together the flour, cocoa powder, sugar, baking powder, baking soda, and salt.
In a separate bowl, beat the egg lightly. Add milk, oil, and vanilla extract, mixing until smooth. Gradually combine the wet ingredients with the dry mixture. Stir gently until just combined.
Add the hot water or coffee and mix until the batter is smooth. Do not overmix.
Pour the batter into the prepared cake pan and tap lightly to remove air bubbles. Place the pan carefully onto the stand inside the preheated pot. Cover with the lid and cook on very low heat for 30–35 minutes, or until a toothpick inserted into the center comes out clean.
Remove carefully and allow the cake to cool before unmolding.
Equipment needed :
Must-Have Tools to Get Rolling
Here’s what you’ll want to have on hand:
Silicone Spatula – Durable, heat-resistant silicone spatula perfect for mixing, scraping, and spreading. Gentle on non-stick cookware and easy to clean.
Large pot – You’ll need this to boil the whole cabbage head and soften the leaves.
large bowl –Spacious, durable large bowl ideal for mixing, serving, or food preparation. Made from sturdy material and easy to clean.
Sharp knife – For coring the cabbage and slicing out the thick stem in each leaf. A paring knife works best.
Mixing bowl – A big bowl makes it easier to combine your meat and rice filling evenly.
Cutting board – For prepping cabbage leaves and rolling them like a pro.
9×13-inch baking dish – Ideal size to fit your rolled cabbage leaves snugly and prevent them from unraveling.
knife – A sharp, durable kitchen knife perfect for slicing, chopping, and dicing with ease.
Servings and timing
This recipe yields approximately 6 slices.
Preparation time: 10–15 minutes
Cooking time: 30–35 minutes
Cooling time: 20–30 minutes
Total time: About 1 hour
Storage/reheating
Store the cake in an airtight container at room temperature for up to two days. Refrigerate for up to four days if frosted.
To reheat, warm individual slices in the microwave for 10–15 seconds. You may also steam gently for a few minutes to restore moisture.
The cake can be frozen for up to one month. Wrap tightly in plastic wrap and store in a freezer-safe container. Thaw at room temperature before serving.
Variations and Customizations
This cake is extremely adaptable. For a richer version, replace hot water with hot brewed coffee. The coffee intensifies the chocolate flavor without making the cake taste like coffee.
You can add chocolate chips to the batter for pockets of melted chocolate. Chopped nuts such as walnuts or almonds provide texture and contrast.
For a frosted version, prepare a simple chocolate ganache using chocolate and cream. Pour it over the cooled cake for an elegant finish. A dusting of powdered sugar also works well for a lighter presentation.
If you prefer a slightly healthier twist, substitute part of the all-purpose flour with whole wheat flour. I have tried replacing one-third of the flour, and the texture remained pleasantly soft.
For a dairy-free version, use plant-based milk and ensure your cocoa powder is dairy-free. The results remain moist and flavorful.
You may also add a pinch of cinnamon for warmth or a few drops of peppermint extract for a subtle variation.
Nutrition and Dietary Info
Approximate values per serving (based on 6 servings):
| Nutrient | Amount per Serving |
|---|---|
| Calories | 290 kcal |
| Protein | 5 g |
| Carbohydrates | 38 g |
| Fat | 14 g |
| Saturated Fat | 2 g |
| Fiber | 2 g |
| Sugar | 24 g |
| Sodium | 190 mg |
Nutritional values may vary depending on specific ingredients used.
Expert Tips & Customizations
Preheat the Pot Properly
A well-preheated pot ensures even cooking from the start.
Keep the Heat Low
High heat can burn the bottom before the center cooks through.
Do Not Open the Lid Frequently
Opening the lid releases heat and can affect the cake’s rise.
Test Carefully
Insert a toothpick in the center; if it comes out clean, the cake is done.
FAQs
Can I make this cake without a stand inside the pot?
A stand helps prevent direct heat contact. Without it, the cake may burn at the bottom.
Can I double the recipe?
Yes, but use a larger pan and extend the cooking time slightly.
Why is my cake dense?
Overmixing or cooking on high heat can cause density.
Can I cook this in a pressure cooker?
Yes, without the whistle. Use it like a covered pot on low heat.
Can I make cupcakes instead?
Yes, divide into small heatproof molds and reduce cooking time.
Can I skip the egg?
The texture may change, but you can experiment with yogurt or applesauce as a substitute.
Conclusion
This 1 Egg Chocolate Cake (No Oven) proves that you do not need complicated equipment or large quantities of ingredients to create a delicious dessert. Moist, rich, and simple to prepare, it is a practical solution for quick chocolate cravings. Once you try it, it may become your go-to small-batch chocolate cake recipe.
Hungry for more? Visit our website for full recipes and follow us on Pinterest for daily foodie inspo you’ll love to pin!