
Why You’ll Love This Recipe
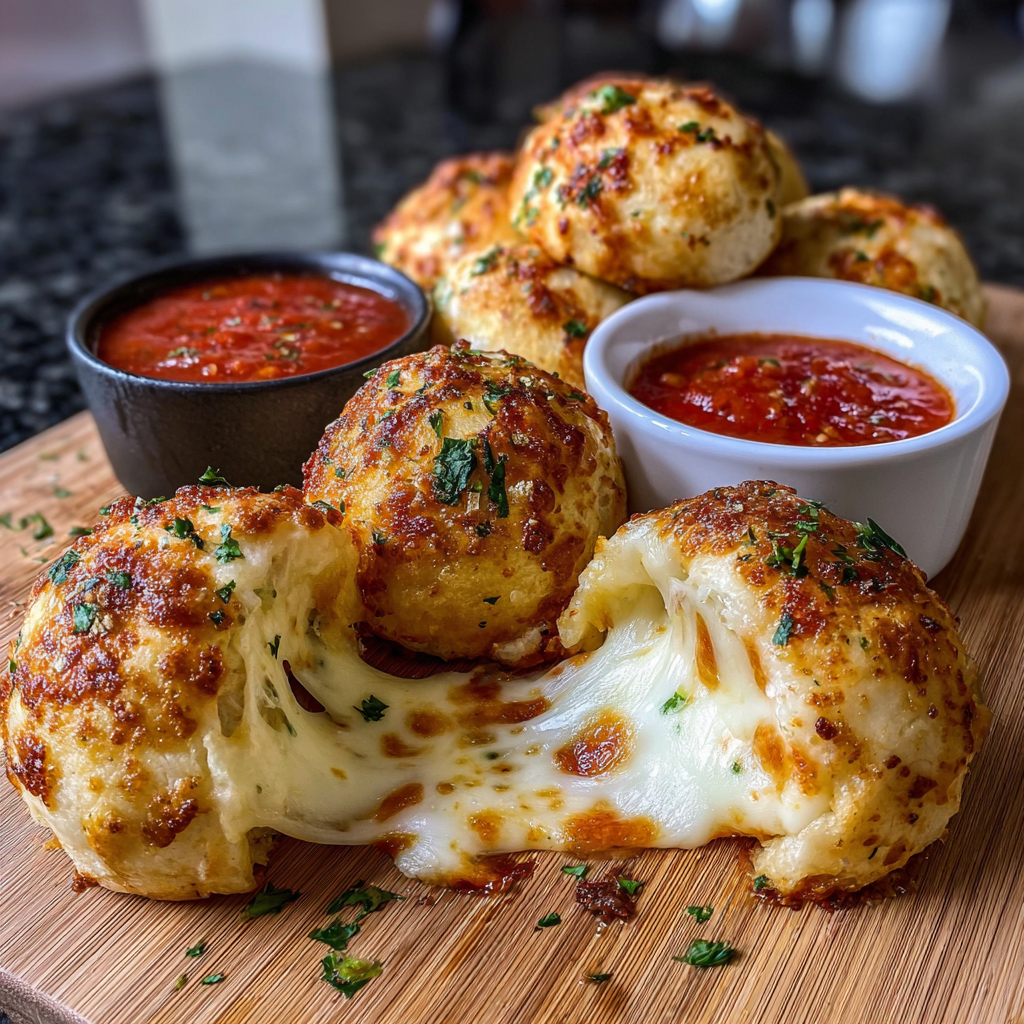
Few snacks deliver instant comfort quite like warm, cheesy bread, and these Gooey Mozzarella Biscuit Bombs do exactly that. They are crisp on the outside, soft and fluffy inside, and filled with molten mozzarella that stretches with every bite. I love how simple this recipe is, yet it feels indulgent enough for parties, game nights, or a cozy weekend treat. The use of refrigerated biscuit dough makes the process approachable, even if you are short on time or not confident with baking. When I first tested this recipe, I experimented with different cheeses and seasonings, but classic mozzarella paired with garlic butter quickly became the clear winner. These biscuit bombs come together quickly, bake beautifully, and disappear even faster. Whether served as an appetizer, side dish, or snack, they are guaranteed to impress with minimal effort.
Print
Gooey Mozzarella Biscuit Bombs – The Ultimate Cheesy Pull-Apart Snack
- Total Time: 25 minutes
- Yield: 8 biscuit bombs
- Diet: Vegetarian
Description
Soft, buttery biscuit dough stuffed with gooey melted mozzarella and baked until golden brown, these biscuit bombs are an irresistible cheesy snack or appetizer.
Ingredients
- 1 can (16 oz) refrigerated biscuit dough
- 8 oz mozzarella cheese, cut into cubes
- 2 tbsp melted butter
- 1 tsp garlic powder
- 1 tsp dried parsley
- 1/4 tsp salt
Instructions
- Preheat oven to 375°F (190°C).
- Separate biscuit dough and flatten each biscuit into a small circle.
- Place one cube of mozzarella in the center of each dough circle.
- Wrap the dough around the cheese and pinch to seal completely.
- Place seam-side down on a lined baking sheet.
- In a small bowl, mix melted butter, garlic powder, parsley, and salt.
- Brush the butter mixture over each biscuit bomb.
- Bake for 12–15 minutes or until golden brown.
- Let cool slightly before serving.
Notes
- Ensure the dough is tightly sealed to prevent cheese leakage.
- Serve warm for maximum gooeyness.
- Optional: add a pinch of chili flakes for heat.
- Prep Time: 10 minutes
- Cook Time: 15 minutes
- Category: Appetizer
- Method: Baking
- Cuisine: American
Ingredients
(Tip: You can find the complete list of ingredients and their measurements in the recipe card below.)
Refrigerated biscuit dough
This forms the soft, fluffy exterior of the biscuit bombs. Store-bought dough is reliable and bakes evenly, creating a tender bite that contrasts perfectly with the gooey filling.
Mozzarella cheese
Mozzarella is the star of this recipe, providing that signature stretch and mild, creamy flavor. I recommend using low-moisture mozzarella cubes rather than shredded cheese for the best melt.
Unsalted butter
Butter is melted and brushed over the biscuit bombs to add richness and help the seasonings adhere. Unsalted butter allows better control over the final saltiness.
Garlic powder
Garlic powder infuses the butter with savory depth without overpowering the cheese. It distributes evenly and avoids the harshness of raw garlic.
Italian seasoning
This blend adds subtle herbal notes that elevate the flavor profile. It complements the mozzarella and butter beautifully.
Salt
A small amount of salt enhances the overall flavor and balances the richness of the cheese and butter.
Fresh parsley
Chopped parsley adds a pop of color and a fresh finish. While optional, it brightens the final dish and makes it visually appealing.
Directions
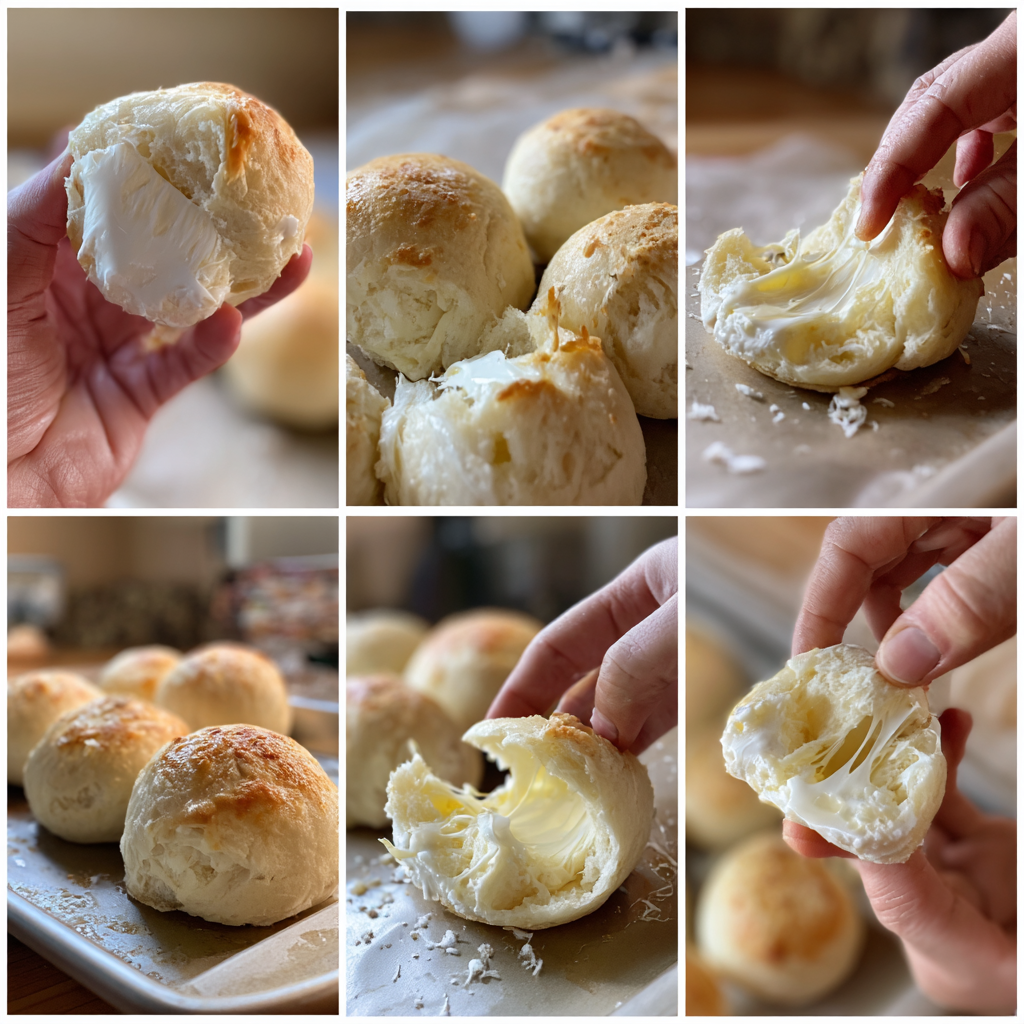
Start by preheating your oven to 190°C and lightly greasing a baking tray. Separate the refrigerated biscuit dough and gently flatten each piece into a small round using your hands. Place a cube of mozzarella in the center of each round, then carefully wrap the dough around the cheese, pinching the seams tightly to seal. This step is crucial to prevent cheese leakage during baking.
Arrange the sealed dough balls seam-side down on the prepared tray, leaving space between each one. In a small bowl, melt the butter and stir in garlic powder, Italian seasoning, and salt. Brush this mixture generously over each biscuit bomb, ensuring even coverage.
Bake for 12–15 minutes, or until the biscuit bombs are golden brown and puffed. Once out of the oven, allow them to cool slightly before sprinkling with fresh parsley. Serve warm to enjoy the full gooey effect.
Equipment needed :
Must-Have Tools to Get Rolling
Here’s what you’ll want to have on hand:
Silicone Spatula – Durable, heat-resistant silicone spatula perfect for mixing, scraping, and spreading. Gentle on non-stick cookware and easy to clean.
Large pot – You’ll need this to boil the whole cabbage head and soften the leaves.
large bowl –Spacious, durable large bowl ideal for mixing, serving, or food preparation. Made from sturdy material and easy to clean.
Sharp knife – For coring the cabbage and slicing out the thick stem in each leaf. A paring knife works best.
Mixing bowl – A big bowl makes it easier to combine your meat and rice filling evenly.
Cutting board – For prepping cabbage leaves and rolling them like a pro.
9×13-inch baking dish – Ideal size to fit your rolled cabbage leaves snugly and prevent them from unraveling.
knife – A sharp, durable kitchen knife perfect for slicing, chopping, and dicing with ease.
Servings and timing
This recipe yields 8 biscuit bombs. Preparation takes approximately 10 minutes, while baking requires 15 minutes, making the total time around 25 minutes.
Storage/reheating
Leftover biscuit bombs can be stored in an airtight container in the refrigerator for up to 2 days. Reheat them in the oven at 180°C for 5–7 minutes to restore their crisp exterior and melty center. Avoid microwaving, as it can make the dough rubbery.
Variations and Customizations
These biscuit bombs are highly adaptable, making them ideal for experimentation. For a sharper flavor, substitute mozzarella with cheddar or a blend of cheeses. Adding small slices of pepperoni or cooked bacon alongside the cheese creates a heartier, pizza-inspired version.
If you enjoy herbs, try mixing dried oregano or rosemary into the butter. A pinch of chili flakes can add gentle heat without overwhelming the dish. For a richer finish, brush the baked bombs with a little extra melted butter and sprinkle with grated Parmesan.
You can also make them sweet by swapping mozzarella for cream cheese and adding a cinnamon-sugar butter topping. This flexibility makes the recipe suitable for both savory and dessert-style adaptations.
Nutrition and Dietary Info
| Nutrient | Per Serving |
|---|---|
| Calories | 210 kcal |
| Protein | 7 g |
| Carbs | 18 g |
| Fat | 12 g |
| Saturated Fat | 6 g |
| Fiber | 1 g |
| Sugar | 3 g |
| Sodium | 420 mg |
Expert Tips & Customizations
Seal the dough properly
Ensure all seams are tightly pinched to keep the cheese inside during baking.
Use chilled cheese
Cold mozzarella melts more slowly, reducing the risk of leakage.
Do not overcrowd the tray
Spacing allows even browning and prevents soggy bottoms.
Serve immediately
These biscuit bombs are best enjoyed fresh while the cheese is still molten.
FAQs
Can I use homemade biscuit dough?
Yes, homemade dough works well, but ensure it is soft and pliable for easy sealing.
What if my cheese leaks out?
A small amount of leakage is normal. Proper sealing and chilled cheese help minimize this.
Can I freeze these biscuit bombs?
They are best fresh, but you can freeze unbaked bombs and bake from frozen with a slightly longer baking time.
Are these suitable for vegetarians?
Yes, this recipe is vegetarian-friendly.
Can I add sauce inside?
Adding sauce may cause sogginess. It is better to serve sauce on the side for dipping.
What dipping sauces pair well?
Marinara sauce, garlic aioli, or ranch dressing complement these biscuit bombs perfectly.
Conclusion
Gooey Mozzarella Biscuit Bombs are a simple yet irresistible recipe that combines convenience with indulgence. With minimal ingredients and quick preparation, they deliver maximum flavor and comfort. Whether you keep them classic or customize them to your taste, these biscuit bombs are sure to become a repeat favorite in your kitchen.
Hungry for more? Visit our website for full recipes and follow us on Pinterest for daily foodie inspo you’ll love to pin!